
Best auger bit for wood post holes really comes down to two things most people feel immediately: how clean the hole starts and whether the bit keeps pulling without overheating or wandering.
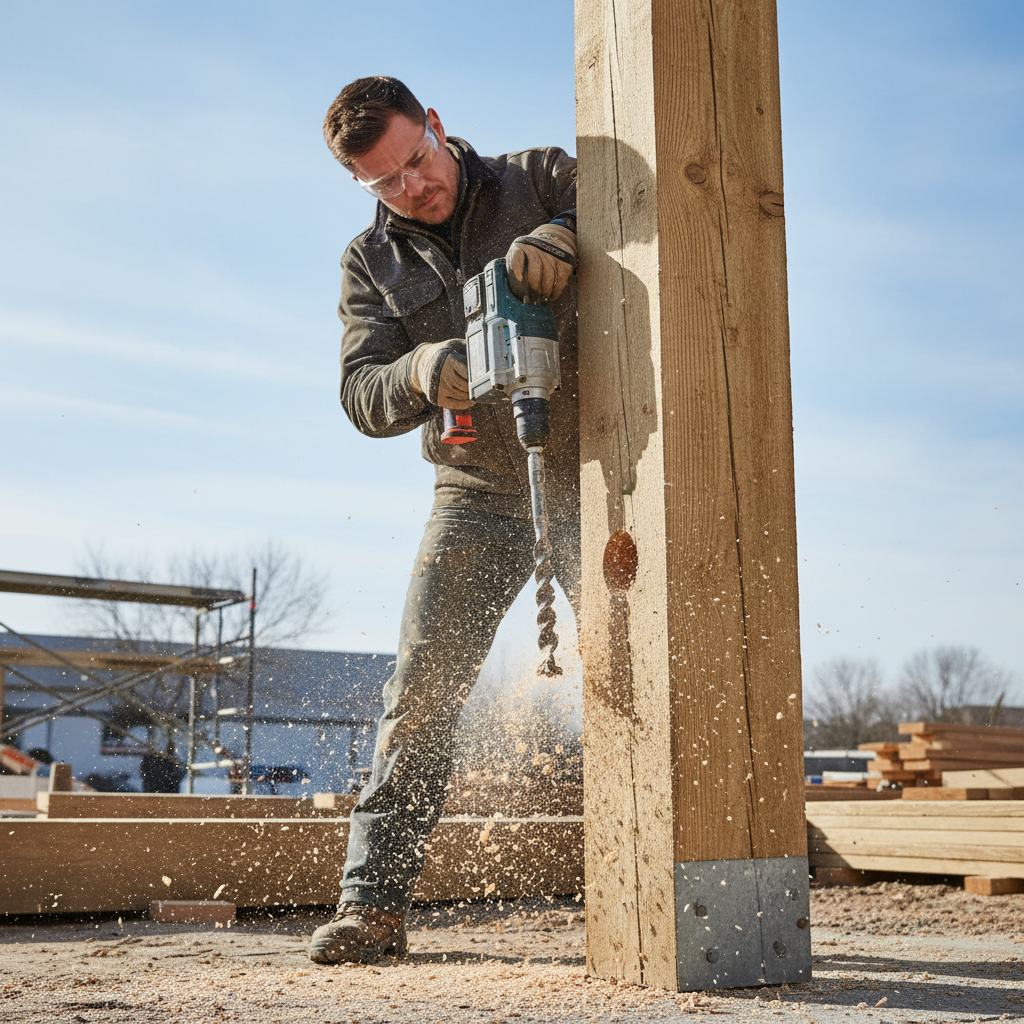
If you drill post holes in pressure-treated lumber, wet 6x6s, or stacked fence rails, the “wrong” auger bit turns into a familiar mess, smoking chips, splintered exits, and a drill that twists your wrist the second the threads grab.
This guide focuses on what actually changes results in the shop or on a jobsite, bit geometry, diameter and length choices, drill compatibility, and a few setup habits that usually matter more than brand names.
What makes an auger bit “best” for wood post holes
A post hole is different from cabinet work, you care about fast chip removal, straight tracking, and a clean shoulder so the bolt head, carriage bolt, or hardware sits flat.
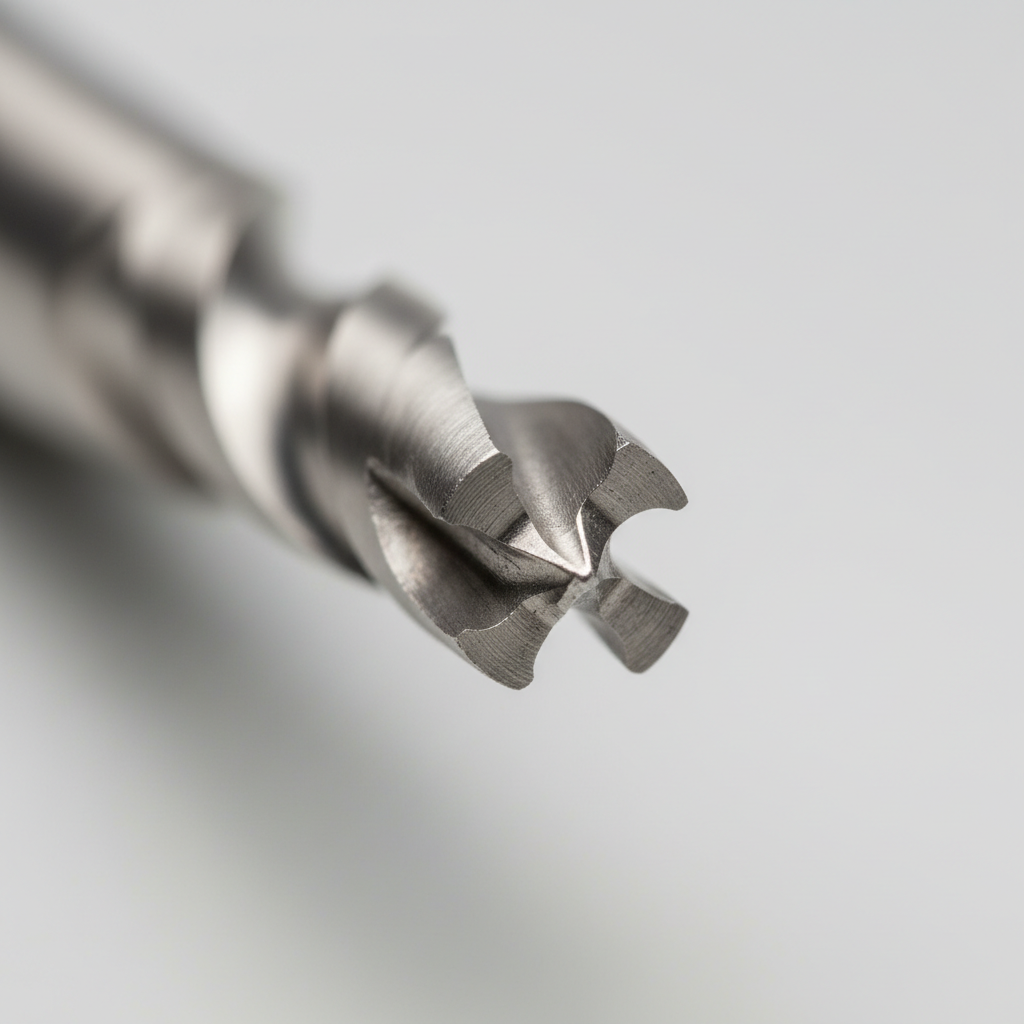
- Lead screw (feed screw): pulls the bit into the wood. Aggressive screws drill fast but can jerk the tool. Fine-thread screws feel more controlled in dense hardwood.
- Flute design: deep, open flutes clear chips better in wet or resinous lumber, which reduces heat and binding.
- Cutting spurs: score the perimeter first, usually cleaner entry and less tear-out, especially across grain.
- Shank style: a 1/4-inch hex shank helps reduce slipping in keyless chucks, but many larger augers use round or reduced shanks for torque.
According to OSHA, rotating tools can catch gloves and loose clothing, so treat high-torque boring like a snag hazard, especially when a self-feeding bit suddenly breaks through.
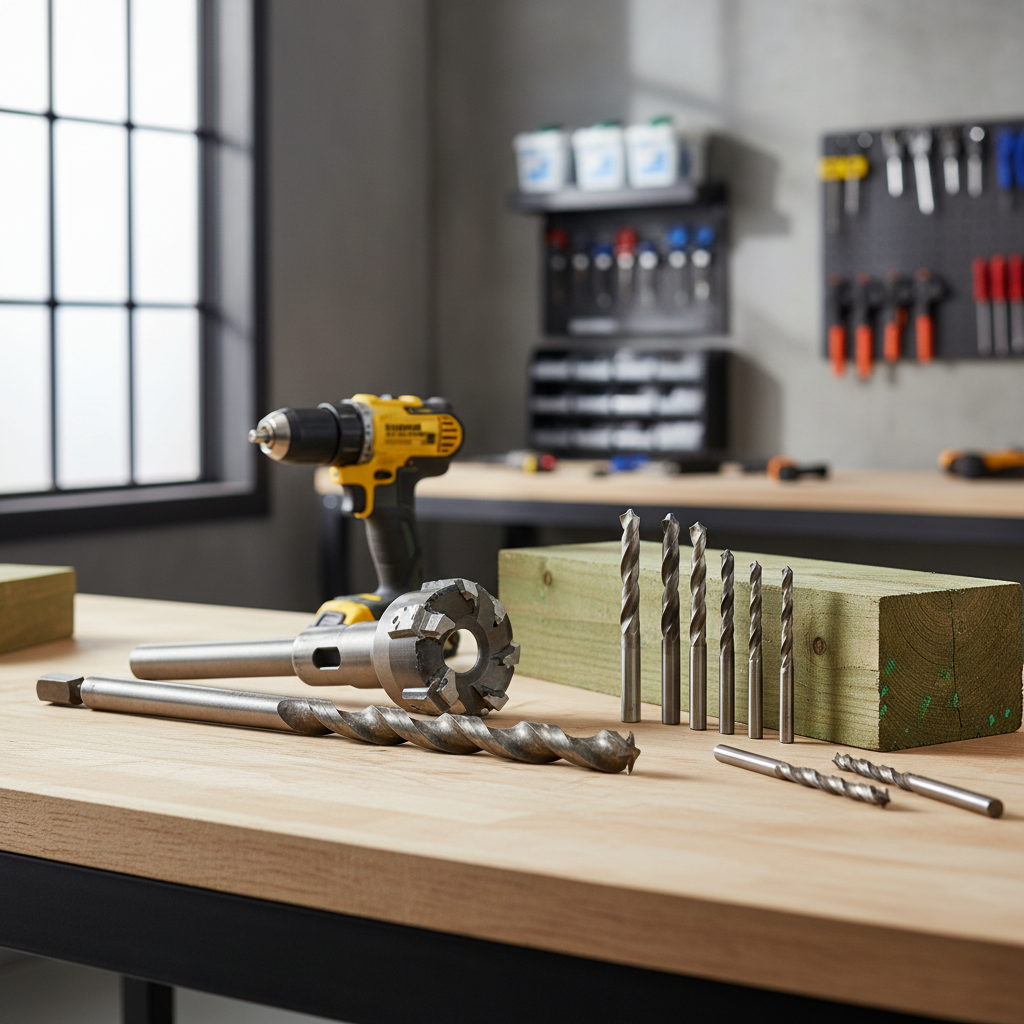
Common auger bit types (and when each one wins)
People often search for the best auger bit for wood post holes and expect one universal answer, but bit style matters because posts vary, 4x4 pine behaves nothing like wet treated 6x6.
Ship auger (traditional wood auger)
Great all-around choice for post drilling. It self-feeds, clears chips well, and tends to run cooler in deeper holes, which helps when you’re drilling repeated holes for carriage bolts or lag screws.
- Best for: deep holes, wet lumber, repeated drilling
- Tradeoff: can pull hard when it bites, your drill needs torque
Self-feed (hole hog) bit
Fast in thick stock, common in framing. It’s less about elegance and more about speed.
- Best for: rough construction, 4x4 and 6x6 through-holes
- Tradeoff: breakout can splinter badly unless you back the exit
Brad-point (forstner alternative for smaller holes)
Not an auger, but worth mentioning if your “post holes” are for smaller hardware. Brad-point bits start accurately and leave clean edges.
- Best for: small-diameter hardware holes where appearance matters
- Tradeoff: slower chip clearing in deep bores
Choosing the right size and length for posts (4x4, 6x6, and beams)
Size choice sounds obvious, match the bolt, match the lag, but in real drilling you also need chip space and room for accuracy.
- Diameter: for bolts, match the bolt size unless your hardware spec calls for a clearance hole. For lags, pilot holes often run smaller than the lag’s outer diameter, follow the fastener maker guidance when available.
- Length: a 6-inch bit covers many 4x4 tasks, but 6x6 posts and angled drilling usually benefit from 7-1/2 to 12 inches so the chuck stays off the wood.
- Long bits wander more: if you need dead-straight holes through a post, consider drilling from both sides using a center mark, or use a drill guide.
If your goal is “one bit that handles most fence and pergola work,” a mid-length ship auger in the common bolt sizes you use most is often the most forgiving pick.
Quick comparison table: what to buy for typical post-hole tasks
Use this as a practical shortcut, then fine-tune based on your drill and lumber type.
| Task | Recommended bit type | Why it fits | Watch-outs |
|---|---|---|---|
| Through-holes for carriage bolts in 4x4 | Ship auger | Clean bore, good chip clearing | High torque on breakthrough |
| Fast rough holes in 6x6 framing | Self-feed | Very fast in thick stock | More tear-out, wrist twist risk |
| Cleaner entry holes where appearance matters | Ship auger with spurs | Scores edge, reduces splintering | Needs steady alignment |
| Small hardware holes (brackets, hinges) | Brad-point | Accurate starts, clean edges | Can clog in deep holes |
How to tell you’re using the wrong auger bit (fast self-check)
Before you buy anything, check what’s going wrong. Usually the symptom points directly to the geometry mismatch or drill setup.
- Bit squeals, chips look like dust: feed rate too light, bit dull, or flutes not clearing. Heat builds fast in treated wood.
- Hole starts off-center: lead screw too aggressive for your control, or you need a more precise starter method.
- Blowout at exit: no backing board, drilling too fast at breakthrough, bit type too “hoggy.”
- Chuck slips: smooth round shank in a tired chuck, or you’re pushing a drill beyond its torque range.
- Drill twists your wrist: too much feed screw bite for the tool, switch to side handle, lower speed, or different bit style.
According to NIOSH, hand and wrist injuries are common with powered hand tools, so if the drill routinely yanks, treat that as a setup issue, not something to “tough out.”
Practical drilling steps for cleaner, straighter post holes
These steps sound basic, but they solve most complaints people have when chasing the best auger bit for wood post holes.
1) Mark and start clean
- Use an awl or nail set to dimple the center point, it helps the lead screw bite exactly where you want.
- If appearance matters, score a light circle with the bit tip before committing to full feed.
2) Control the feed, don’t just lean on it
- Low speed, high torque works better for large-diameter boring.
- Let the lead screw pull, but keep a firm stance. A side handle is worth using on bigger bits.
3) Clear chips on purpose
- Every couple inches, back the bit out to break chips and cool the cutting edges.
- In wet treated posts, do this more often, packed chips can bind suddenly.
4) Prevent blowout at the exit
- Clamp scrap wood tight against the exit side as a backer.
- Or drill halfway from one side, then finish from the other using the lead screw’s pilot hole as a locator.
Key buying criteria for 2026 (what’s worth paying for)
Marketing gets loud around coatings and “speed,” but a few practical factors usually matter more in day-to-day post work.
- Replaceable tip or resharpenable edge: if you drill treated lumber often, the ability to touch up edges helps more than fancy finishes.
- True, consistent diameter: cheaper bits sometimes cut oversize or chatter, which matters when hardware must sit tight.
- Shank grip: if your drill chuck has ever slipped, prioritize a hex or tri-flat shank when available in your size.
- Bit balance: a well-ground auger runs smoother, less fatigue over multiple holes.
- Availability of common sizes: it’s underrated, buying a line where replacements are easy to find saves downtime.
Key takeaway: match the bit’s feed aggressiveness to your drill and your comfort level, the fastest option on paper can be the least productive if you fight it every hole.
When to slow down and get help (or switch tools)
If you’re drilling large holes with a small cordless drill, the problem may not be the bit at all. A heavier drill with a side handle or a right-angle drill can be a safer match for high-torque boring. In some setups, a drill press with proper support is the cleanest route, if the post can be positioned safely.
If you notice repeated kickback, numbness, or you’re working off a ladder, consider asking a more experienced carpenter for technique help or using a different method. In many situations, that’s the difference between “annoying” and “dangerous.”
Conclusion: picking the best auger bit for your post holes
The best auger bit for wood post holes is the one that tracks straight, clears chips without drama, and matches your drill’s torque so you stay in control. For many DIY fence, deck, and pergola projects, a ship auger with cutting spurs in your most-used bolt size is a solid starting point, then add a more aggressive self-feed only if you truly need speed in thick stock.
If you want a simple next step, choose the right diameter for your hardware, buy a length that keeps the chuck off the wood, then practice on scrap to dial in speed and chip-clearing habits before you drill the real posts.