
How to cut tile with a manual tile cutter comes down to two things most people overlook: a stable setup and a consistent score line, because a “pretty good” score often turns into a chipped edge when you snap.
If you’re tackling a backsplash, bathroom floor, or laundry room refresh, the manual cutter is usually the fastest path to clean straight cuts without dust, noise, or hauling out a wet saw, but only if you match the tool to the tile and use the right pressure.
This guide walks through what a manual tile cutter can and can’t do, how to dial in the scoring and snapping, and what to try when cuts keep drifting or edges keep breaking out.

Know what a manual tile cutter is good for (and what it isn’t)
A manual tile cutter is built for straight cuts on brittle, flat materials, using a carbide or titanium scoring wheel to weaken the glaze, then a pressure foot to snap along that score. It’s simple, but it has limits.
- Usually a great fit: standard ceramic wall tile, many porcelain tiles (especially thinner formats), and some glass tile if the cutter is designed for it.
- Often a rough fit: thick textured porcelain, very small mosaics, stone (marble, granite), and anything needing curves or notches.
- Not the right tool: L-cuts around outlets, U-cuts around pipes, and tight curves, those typically call for a wet saw, angle grinder, hole saw, or specialty nippers.
According to OSHA, silica dust exposure is a serious jobsite hazard, and wet cutting methods are commonly used to reduce airborne dust. A manual cutter can be a lower-dust option for straight cuts, but you still want eye protection and tidy cleanup.
Tools and materials checklist (before you score anything)
You can cut tile with surprisingly few items, but the “small stuff” changes the outcome, especially measuring and support.
- Manual tile cutter sized for your tile length (and rated for your tile type)
- Tape measure, pencil or fine marker, and a square or straightedge
- Non-slip mat or clamps for stabilizing the cutter if needed
- Safety glasses, and gloves if you’re sensitive to sharp edges
- Sanding stone or diamond hand pad for light edge dressing
If the cutter’s scoring wheel looks chipped, flat-spotted, or doesn’t roll smoothly, replace it first. A worn wheel is one of the quickest ways to create blowout at the snap.
Set up and mark the tile so the cut lands where you expect
Most “my cutter is inaccurate” complaints trace back to measuring, not the cutter. Tile layouts include grout joints, movement gaps, and walls that aren’t perfectly square, so you want to mark with intent.
Measure with grout in mind
- Include your grout joint width in your measurement, not just the tile body size.
- Account for a small perimeter gap at walls and cabinets, many installations need it, and it later hides under trim or caulk.
Mark a clear line
- Use a square to draw a crisp cut line across the face of the tile.
- For dark or textured tile, a fine-tip paint marker can be easier to see than pencil.
Dry-fit the tile in place if the cut is “one shot,” like a visible edge near a tub or open end of a backsplash. It sounds slow, but it’s faster than recutting.
How to cut tile with a manual tile cutter: scoring and snapping technique
How to cut tile with a manual tile cutter without chipping is mostly about controlled pressure, one clean score, and snapping with the pressure foot centered. The common mistake is multiple passes or “sawing” the wheel.
Step-by-step
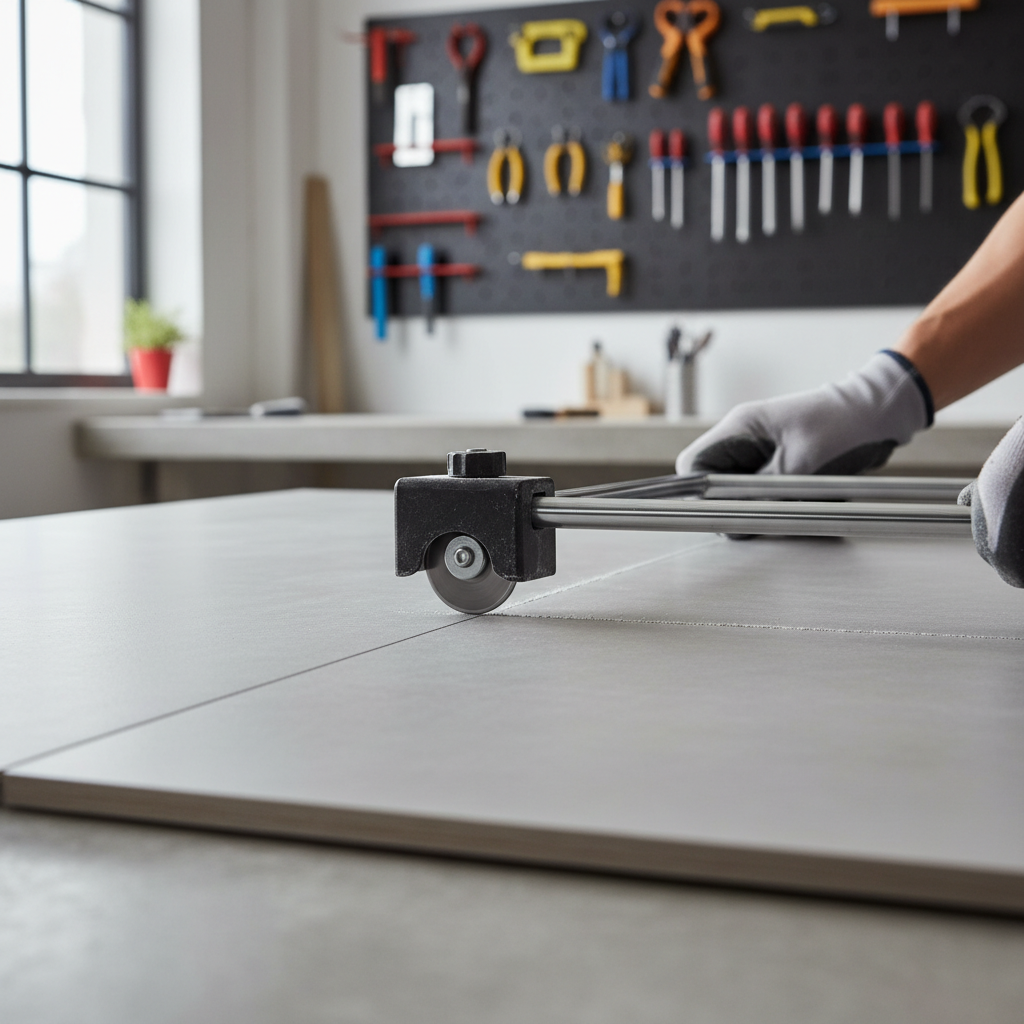
- Align: Place the tile tight to the fence, line up the scoring wheel to your mark, and confirm both ends of the line match.
- Score once: Pull or push the handle so the wheel travels the full line in a single pass. You want firm, steady pressure, not a white-knuckle grind.
- Listen and feel: Many tiles give a consistent scratching sound. If it skips or chatters, your alignment or wheel may be off.
- Snap: Position the pressure foot centered over the score line, then press down smoothly until the tile breaks.
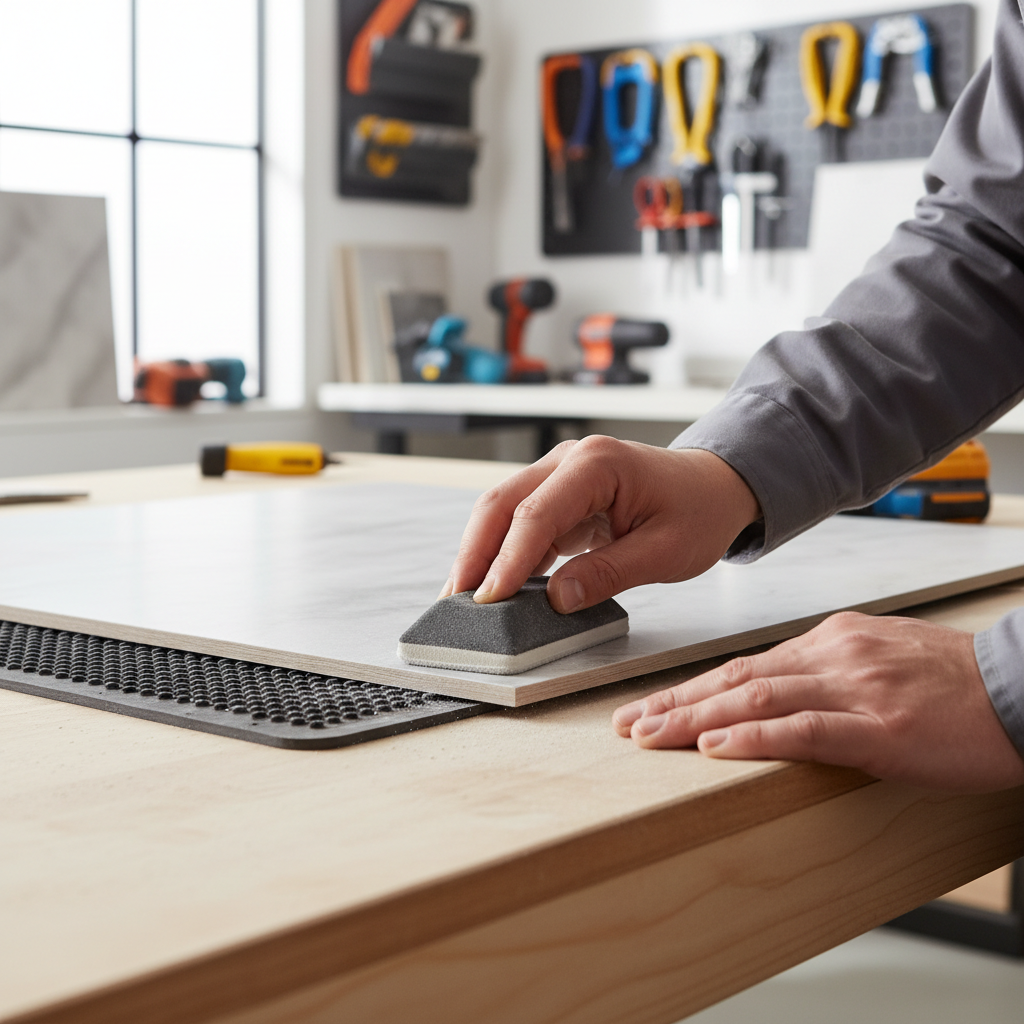
- Dress the edge: If the cut edge will be exposed, lightly rub with a sanding stone to remove sharpness and tiny chips.
One score pass matters because every extra pass widens the fracture zone, which makes the snap more random. If you missed the line, it’s usually better to start with a fresh tile than to try “correcting” the score.
Quick troubleshooting: why your tile keeps chipping or breaking wrong
Even if you know the basics, certain tiles fight back. Use this as a fast diagnostic before blaming the tool.
| Problem | Likely cause | What to try |
|---|---|---|
| Chips along the glaze | Too much scoring pressure, worn wheel, textured glaze | Reduce pressure, replace wheel, score once with steady speed |
| Tile snaps off the line | Fence misalignment, tile not seated flat, uneven snap pressure | Re-square the fence, clean bed rails, center pressure foot on score |
| Tile won’t snap cleanly | Tile too thick/hard for cutter, shallow score | Confirm cutter rating, increase scoring pressure slightly, consider wet saw |
| Crack starts but runs sideways | Score didn’t reach full length, wheel skipped at start/end | Start score at edge, finish past line end, keep wheel rolling smoothly |
| Edge looks rough | Normal micro-chipping on some porcelain | Use a diamond hand pad, hide edge under trim, switch cutting method |
If you’re seeing random breakage on porcelain, it may be the tile body density and thickness versus your cutter’s strength, especially on large-format pieces where flex increases.
Self-check: is a manual cutter the right choice for your tile and layout?
Before you commit, run through this list. It saves money and frustration, and it helps you choose when to rent a wet saw.
- Cut type: Mostly straight cuts, no L-notches, no curves.
- Tile size: Fits comfortably on the cutter bed with room to align.
- Tile material: Ceramic is usually easy, porcelain varies, glass needs the right wheel and a gentle touch.
- Finish expectations: Visible edges may need edge trim or polishing.
- Quantity: Many repeat cuts favor a manual cutter because it’s fast once dialed in.
If three or more items feel shaky, you can still try the manual cutter, but plan a backup option so the project doesn’t stall mid-install.
Practical tips for cleaner cuts (the stuff people learn after wasting tile)
These are small adjustments, but they tend to separate clean “installer-looking” cuts from jagged ones.
- Support large-format tile: If the tile hangs off the bed, it flexes and the snap wanders. Add side support with a stable board at the same height.
- Keep rails and bed clean: A grain of thinset, grout, or debris can tilt the tile enough to change the break line.
- Don’t rush the snap: A smooth press usually breaks cleaner than a quick jab.
- Practice on offcuts: Different tiles need different scoring pressure, even within “porcelain.”
- Hide what you can: Place factory edges on the most visible side, save cut edges for corners, under trim, or behind outlets.
Safety and common mistakes to avoid
Manual cutters are safer than many power tools, but they still create sharp edges and flying fragments. Eye protection is a simple win.
- Skipping safety glasses: A snapped corner can pop off fast, even on small tiles.
- Double-scoring the same line: It feels “more thorough,” but it often makes the break less predictable.
- Cutting tiny slivers: Very thin rips can shatter during the snap. In many cases, a wet saw or grinder works better.
- Ignoring movement gaps: Tight tile-to-wall cuts can crack later, depending on substrate and conditions.
If you’re cutting tile that may contain crystalline silica and you switch to power cutting, dust control becomes a bigger deal. According to NIOSH, controlling respirable silica exposure can require wet methods and proper respiratory protection, and for some situations it’s worth consulting a qualified contractor.
Key takeaways and next steps
How to cut tile with a manual tile cutter is simple once you respect the process: mark clearly, align carefully, score once with steady pressure, then snap smoothly with the foot centered. If chips keep showing up, it’s usually wheel condition, pressure, or tile-tool mismatch rather than “bad luck.”
Your next move: test-cut two or three spare tiles, adjust scoring pressure until the snap feels consistent, and decide early whether any tricky cuts justify renting a wet saw for a day.
FAQ
Can I cut porcelain tile with a manual tile cutter?
Often yes, but it depends on thickness, texture, and the cutter’s rating. Dense or textured porcelain may chip more, and some projects move faster with a wet saw once you factor in waste.
How hard should I press when scoring?
Firm enough to create a continuous score, not so hard that the wheel digs and flakes the glaze. If you see heavy chipping along the line before snapping, back off pressure and check the wheel.
Should I score a tile more than once?
Usually no. Multiple passes can widen the fracture area and make the snap unpredictable. A single clean score is more reliable for most ceramic and many porcelain tiles.
Why does my tile break before I get to the snap step?
It’s commonly from pushing down too early while scoring, or from the tile not sitting flat on the bed. Confirm the tile is supported and keep scoring pressure directed into the wheel path, not into bending the tile.
How do I cut a thin strip off a tile with a manual cutter?
Thin rips are where manual cutters struggle. If the strip is narrow, the tile may crumble at the snap, in that case a wet saw, grinder with a diamond blade, or nibblers may be more dependable.
How do I prevent chipping on the finished edge?
Use a sharp scoring wheel, score once, and dress the edge with a rubbing stone. If the edge will be exposed, consider a metal edge trim or placing factory edges at the most visible runs.
Is a manual tile cutter good for subway tile backsplashes?
In many kitchens, yes, because subway tile is typically ceramic and straight cuts dominate. You’ll still need another tool for outlet notches and small corner details.
If you’re in the middle of a tile project and you want a more predictable workflow, it can help to map your cut list and identify which cuts belong on a manual tile cutter versus a wet saw day rental, that mix often reduces waste without overbuying tools.