
internal external snap ring plier is the tool most people reach for when a circlip won’t budge, keeps flying off, or refuses to seat in the groove without a fight.
If you’ve ever watched a snap ring ping across the shop, you already know the pain: wrong tip size, wrong direction, weak grip, or a ring that’s simply not meant to be reused. The good news is that most of these headaches come down to a few predictable choices and a repeatable technique.
This guide helps you pick the right pliers, confirm whether your ring is internal or external, and apply enough control to avoid scratched bores, bent rings, and wasted time. You’ll also get a quick troubleshooting checklist, plus a simple table for matching tips and ring size.
Internal vs. external snap rings: what the tool must do
Snap rings (often called circlips) work because they sit in a machined groove and resist movement. The type tells you which motion the pliers must create.
- Internal snap ring: sits inside a bore, you compress the ring to remove, and expand to install into the groove.
- External snap ring: sits on a shaft, you expand to remove, and compress to install into the groove.
That’s why an internal/external convertible plier (or a set that includes both) matters. If the jaws move the wrong direction, you’ll feel it immediately: the tips cam out, the ring twists, and the holes start to deform.
Key point: don’t guess by the part name in a manual. Look at where the ring lives, bore or shaft, then confirm the direction you need the ring to move.
Common reasons snap ring pliers “don’t work” in real jobs
Most complaints aren’t about the pliers being “bad,” they’re about a mismatch between ring, tips, and access.
- Tip diameter mismatch: tips too small wobble in the ring holes, tips too large won’t seat fully, either way the ring can launch.
- Tip style mismatch: straight tips in a recessed groove, or 90-degree tips when you need a direct approach, creates side load and slip.
- Ring tension and material: some rings are stiff, some are springy, some are cheap and deform easily, and reusing them may not be realistic.
- Access issues: deep bores, surrounding shoulders, grease, or burrs in the groove make the job feel impossible.
- Over-expanding: opening the ring “a little more just to be safe” often bends it permanently.
According to OSHA, flying particles and ejected parts are a common shop hazard, so eye protection is a sensible baseline when working with spring steel rings that can release energy suddenly.
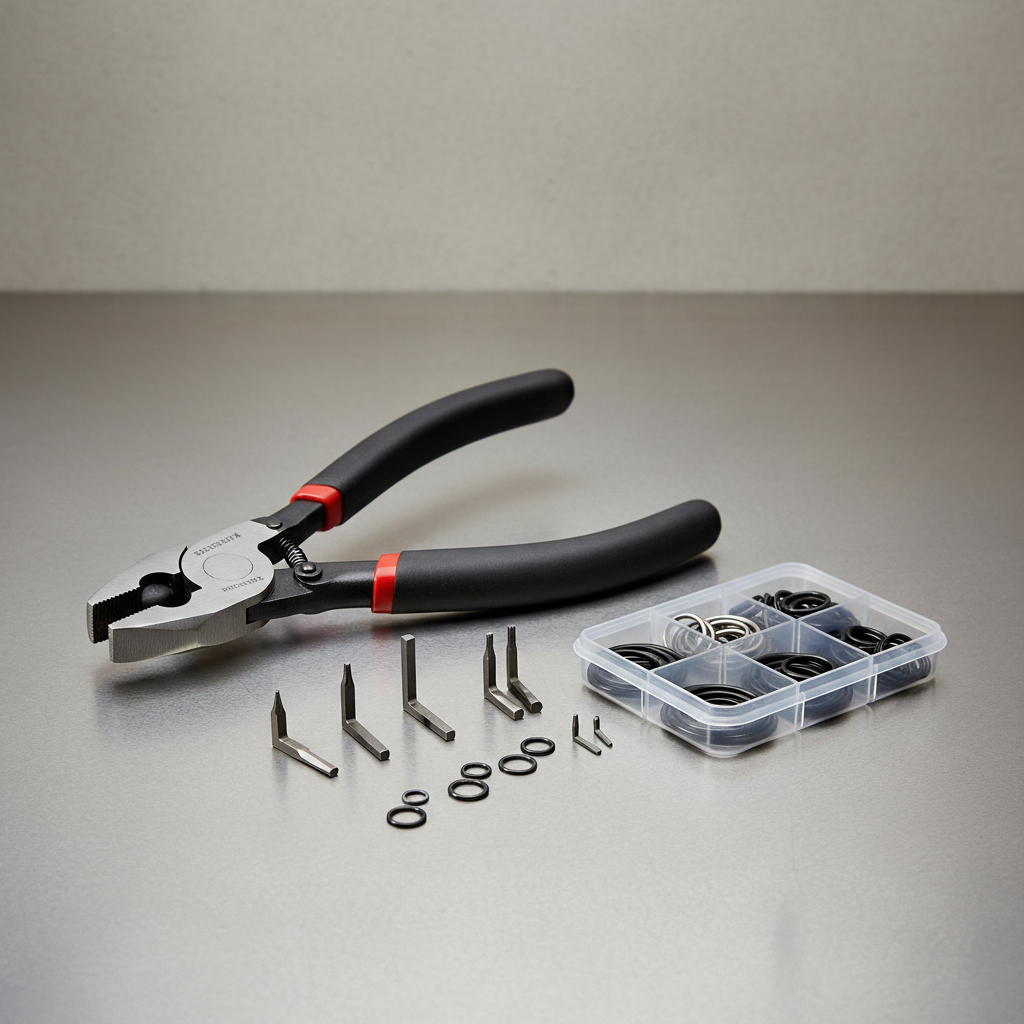
How to choose an internal external snap ring plier (with a quick table)
Choosing well is less about brand hype and more about fit, control, and access. A good internal external snap ring plier should hold tips securely, feel rigid under load, and match your most common ring sizes.

What matters most
- Convertible vs. dedicated: convertible pliers cover more jobs; dedicated internal and dedicated external pliers usually feel stiffer and more precise.
- Tip retention: threaded tips with a solid seat usually outperform push-in tips for higher tension rings.
- Tip options: straight, 45-degree, 90-degree, and long-reach tips cover most scenarios.
- Jaw spread range: make sure the max opening/closing range matches your ring sizes, not just “fits most.”
- Handle control: spring return is convenient, but too-strong springs can fight your control on small rings.
Quick matching table (rule-of-thumb)
Exact sizing varies by ring standard and manufacturer, so treat this as a starting point and test fit before committing force.
| Job situation | Tip style to try | Tip diameter guidance | Why it helps |
|---|---|---|---|
| Open access on shaft (external ring) | Straight | As large as fits the ring holes | Reduces wobble, improves grip |
| Recessed groove in bore (internal ring) | 90-degree or long-reach | Snug fit without forcing | Improves approach angle, reduces side load |
| Limited side clearance | 45-degree | Snug fit | Lets your hands clear obstacles |
| Soft/cheap ring holes deform easily | Straight with larger tip | Largest safe fit | Spreads load across more contact area |
Fast self-check: what kind of snap ring job do you have?
Before you squeeze anything, run this quick diagnostic. It saves time, and it prevents “mystery slipping” that’s really a setup issue.
- Location check: ring sits in a bore (internal) or on a shaft (external)?
- Hole condition: holes round and clean, or stretched and sharp-edged?
- Groove condition: any burrs, rust, or packed grease in the groove?
- Access check: can straight tips approach in line, or do you need angled/long tips?
- Reusability: does the ring look kinked, cracked, or permanently widened?
If you answer “burrs” or “deformed holes,” your best move may be cleanup or replacement, not brute force.
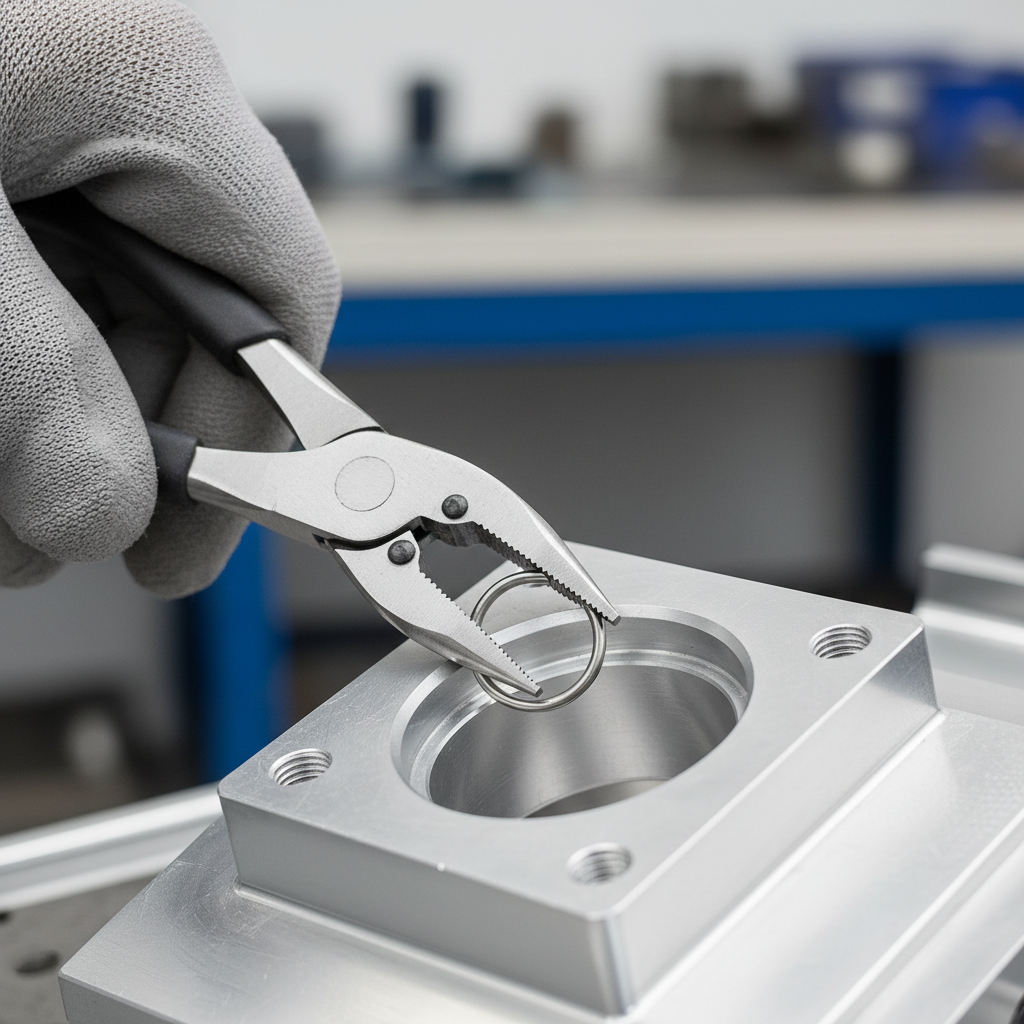
Step-by-step use: removal and installation without drama
This is the part people rush. Slow down, keep the ring controlled, and you’ll see fewer launches and fewer damaged grooves.
Removal steps (internal or external)
- Clean the area enough to see both ring holes and the groove edge.
- Select tips that fully seat in the ring holes with minimal wiggle.
- Seat both tips, then apply pressure smoothly until the ring just clears the groove.
- Keep a finger or a rag “shield” near the ring path to reduce the chance of ejection.
- Lift out slowly, then relax the pliers only after the ring is away from the part.
Installation steps (where most rings get bent)
- Inspect and lightly deburr the groove if needed, if you’re not sure, stop and consult a machinist or technician.
- Confirm the ring orientation, some rings have a sharper edge from stamping, and many mechanics prefer placing the sharper edge to match expected thrust direction, but this can vary by application.
- Expand/compress only enough to start the ring into position, avoid “extra travel.”
- Seat one side into the groove, then work around until you feel it drop into place.
- Verification: rotate the ring in the groove with a pick, it should move slightly and sit flat.
Troubleshooting: when the ring slips, twists, or won’t seat
When an internal external snap ring plier keeps slipping, you can usually diagnose it in under two minutes.
- Tips pop out of holes: move up one tip diameter, switch to threaded tips, or replace worn tips.
- Ring twists into a spiral: you’re applying side load, change approach angle (45/90-degree tips) and reduce travel.
- Ring won’t drop into groove: groove likely has debris or burrs, or the ring size is wrong for the groove.
- Ring seats but feels proud: ring may be upside down for that application, or not fully in the groove all the way around.
- Holes deform immediately: ring quality is low or the ring is not meant to be reused, replacement is often the only clean fix.
Practical tip: if you feel yourself squeezing harder and harder, stop. Snap rings reward finesse more than force, and the groove usually loses the fight.
Safety, care, and when to bring in a pro
Snap rings store spring energy, and the sharp edges can cut skin or eyes fast. Many shops treat eye protection as non-negotiable for this job, and it’s a smart habit for home garages too.
- Eye protection: highly recommended, especially with small high-tension rings.
- Hand positioning: keep your off-hand out of the likely launch path.
- Tool condition: replace tips that are rounded, bent, or loose, worn tips cause most “random” slip.
- Lubrication: a light wipe can help control, but too much oil makes tip seating worse.
If the snap ring retains a critical bearing, brake component, drivetrain part, or anything safety-related, and you can’t verify full seating, consider asking a qualified mechanic or technician to confirm. In many cases it’s a quick second look, and it prevents expensive damage later.
Conclusion: a reliable process beats brute force
A good internal external snap ring plier helps, but the bigger win comes from matching tip size, using the right approach angle, and limiting travel so the ring stays in control. If you do one thing next, measure the ring holes, pick the largest tip that seats cleanly, and verify the ring sits flat in the groove before you call it done.
If you’re building a small kit, aim for a plier with secure threaded tips plus straight and 90-degree options, that combination covers a surprising number of repairs without turning every snap ring into a wrestling match.
FAQ
What is the difference between an internal and external snap ring plier?
It’s the jaw motion: internal rings usually need compression for removal and expansion for installation in a bore, while external rings need the opposite on a shaft. Some pliers convert between both modes.
Why does my snap ring keep flying off the pliers?
Most often the tips are too small or not fully seated, or the ring needs an angled approach and you’re forcing it straight. Worn tips and over-expanding also make launches more likely.
Do I need interchangeable tips or fixed tips?
Interchangeable tips cover more sizes and access angles, which helps if you work on mixed equipment. Fixed tips can feel more rigid, but only if they match the rings you see most.
Can I reuse a snap ring after removing it?
Sometimes, but it depends on the ring material and whether it deformed. If the ring looks stretched, kinked, or the holes oval out, replacement is usually safer and faster.
What tip angle should I use in a deep bore?
90-degree or long-reach tips often give better alignment in recessed grooves. The goal is to minimize side load so the ring doesn’t twist.
My snap ring won’t seat even though it’s the right size, what should I check?
Look for burrs, corrosion, or packed debris in the groove, and confirm the ring isn’t over-expanded during installation. If the groove edge is damaged, a professional inspection may be worth it.
Is there a safer way to remove small snap rings?
Work inside a clear plastic bag or cover the ring with a rag while you control the pliers, and wear eye protection. Small rings can eject unexpectedly even with good technique.
If you’re doing this work often, or you’re tired of one pair of pliers sort-of working on every ring, it may be worth upgrading to a set that includes a sturdier internal/external mechanism and a wider tip selection, it’s one of those purchases that quietly reduces frustration job after job.